

With the development of data analysis tools and software, users of Tableau visualizations can save time and effort by taking advantage of the integration between ChatGpt and Tableau, thus automating processing with more flexibility.
How is that done? This is what we will explain in our article today, let’s get started
As we mentioned, the process will be done using the ChatGPT application. What is the concept of this application?
We will not go into complex technical details that explain the mechanism of action of this application, as this is not our topic today, and we may devote a detailed explanation to it in the coming days, but what we are interested in explaining now is what serves the topic we are talking about, which is integration with Tableau functions
ChatGPT is a conversational bot based on artificial intelligence with its amazing capabilities in conducting conversations and interacting with questions and inquiries in a linguistic manner similar to the nature of human reaction and you can use it in a variety of functions and inquiries including data visualization which is the focus of our topic for this day
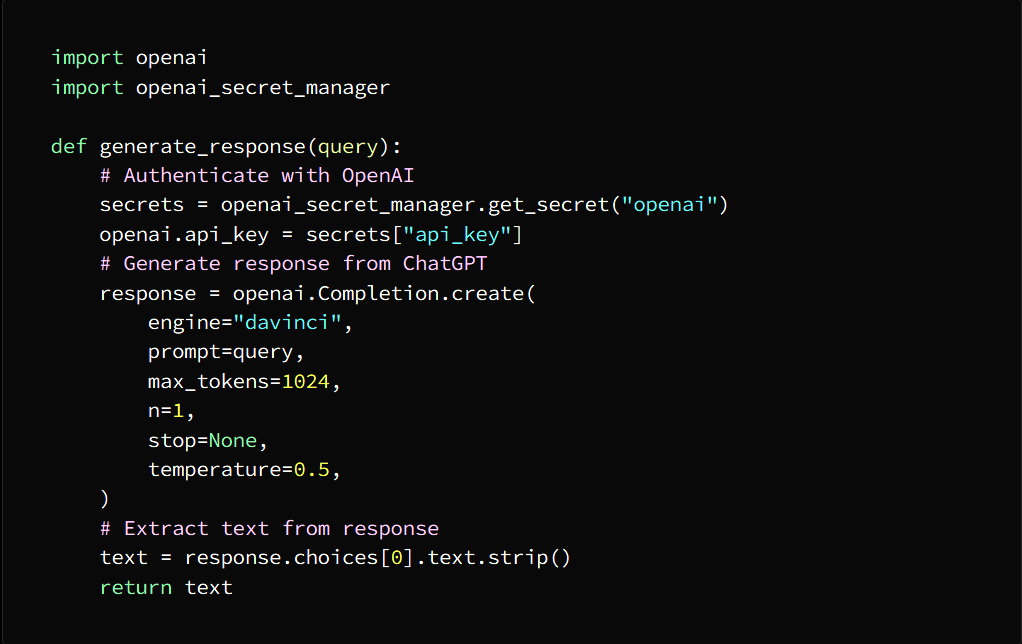
First we need to install the OpenAI API as a first step to start using ChatGBT and then authenticate our credentials using JavaScript and entering the following code:

Once this process is complete, we can use ChatGpt to create visualizations in Tableau
Why is ChatGPT integration important to Tableau functionality?
In short, the basic necessity of this integration process is that it allows answering the most difficult questions and inquiries in an easy way and in natural language, and through which we can Tableau visualize these answers
Also, through this integration process, we can create interactive dashboards that help users find solutions to their inquiries in a timely manner, and thus their ability to identify patterns in their data and outliers at high speed makes reaching sound decisions easier.
Now let’s learn how to integrate ChatGPT with Tableau
This is done by carrying out the following stages
Step 1: Connect Tableau to your data source
This is done by selecting the Connect button in the upper left corner of the Tableau interface and then selecting the data source
Step 2: Install and configure TabPy
TabPy is a Python package that allows us to use Python scripts in Tableau
First enter the following command

After completing the installation of TabPy, we proceed to configure it to work with Tableau, and this is done by running TabPy with the following command in the terminal

Step 3: Install and configure the ChatGPT API
The ChatGPT API is a REST interface
At this stage, we install and prepare the ChatGPT API, and to be able to interact with the ChatGPT pattern, we install the ChatGPT API, and this is done by entering the following command in the Terminal window

Then, we set up the authentication, and this is done by obtaining the API key through a subscription request in OpenAI, and then you go to set it up in Python by running the following command:

Create integration between ChatGPT and Tableau (Python)
After successfully completing the previous steps, it remains to create the ChatGPT integration with Tableau
This is done by following these steps:
Step 1: Choose a Python function that calls the CHatGPT API
ChatGPT’s function here is to return the response from the queries entered into it
This is what the following example shows
Step 2: Use TabPy to register a Python function
This means registering a Python function with TabPy to be used in Tableau by running the following command in the Terminal window

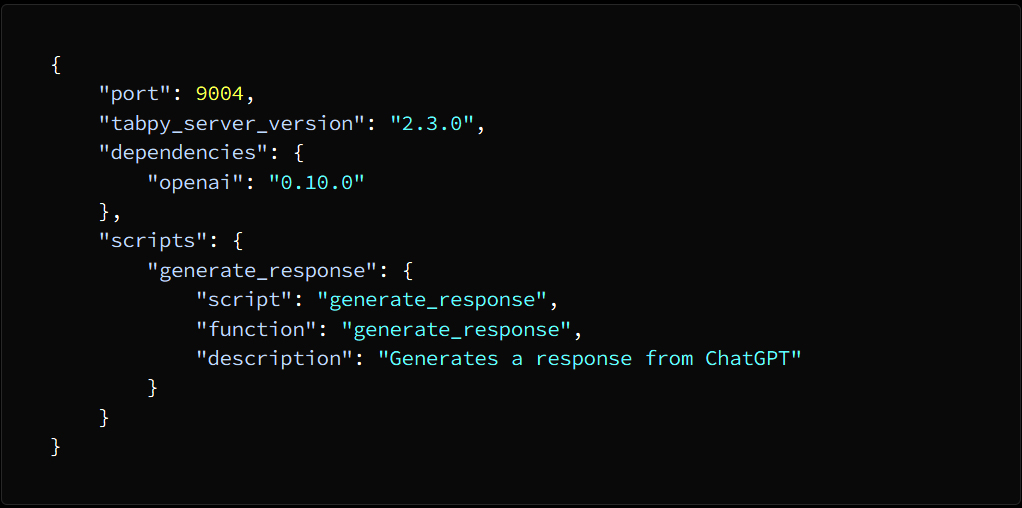
This will create a TabPy configuration file, open it and add the following lines:

Save the file, and to start TabPy run the following command:

Step 3: Use the Python function in Tableau
To do this, we open a new workbook in Tableau and do the following:
1. We drag the “Text” object into the control panel
2. Click on the text and choose “Edit text” and in the dialog box type the following formula:

3. Then click OK and the text edit box will close
4. Drag the Parameter object onto the Control Panel
5. In the “Create Parameter” dialog box, set the data type to “String” and choose “all” to the available values, and set the current value to “empty string”, then click OK.
6. On the Parameter object, right-click and select Show Parameter Control.
7. Type a query in “Input Text” and press Enter
8. It will display the reply from ChatGPT in a “text” object and then call ChatGPT and Tableau together
Merger may seem a tiring process at first, but doing it repeatedly, even on a small scale, will develop your skills and develop capabilities to process data in a flexible and fast manner, and help you to troubleshoot problems and address them more effectively than before.
Create visualizations:
Using ChatGpt:
The first thing we need to do is provide ChatGpt with the data to be visualized, and after it receives the data that we have given it to it via a group or by passing a table, it will create the visualization according to the requests assigned to it
See in this code inserted in JavaScript how we create a visualization
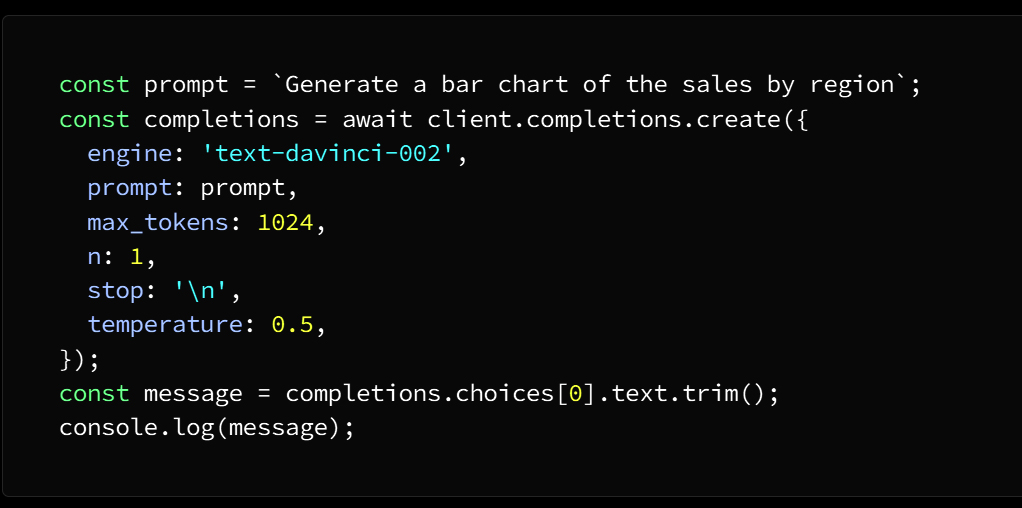
In the above code we use OpenAI API functions to generate a bar chart of sales by location
We enter this request into ChatGpt via the immediate variable, to create the visualization we use the client.completions.create function and at the end we can display the resulting visualization in Tableau which was previously stored in the message variable
customize the resulting perceptions
We can customize the resulting visualizations according to our requirements in terms of changing the visualization type, size and color style, and this is done by providing ChatGpt with additional parameters
We can do this by using the following code in JavaScript

And keep in mind that experimenting with different parameters is a powerful tool for creating engaging and innovative visuals
What we did in the previous code is we created a quarterly earnings line chart using blue
Then we entered our request into ChatGpt through the immediate variable
Then we selected the appropriate visualization style, so we have a line chart in blue color and size according to demand
Show the visuals in Tableau
And as a reminder.. All of the above stages and procedures are to create a visualization using ChatGpt
But you promised us in this article that we will show the visualization in Tableau
Well don’t worry we’re not done yet..let’s go
The first thing we have to do is copy the resulting visualization from the message variable and paste it into Tableau and this is done by implementing the following steps
• Create a new worksheet in Tableau
• Select “Text” from the “Marks” section.
• Paste the visualization copied from the message variable into the text box and adjust the size of the text box to fit the visualization
• Congratulations.. The visualization has finally appeared in Tableau
And at the end of our interview today, allow me to pre-empt things and gladly answer some questions that some of the readers are likely to have.
Question 1: Are there free versions of ChatGPT?
Answer: Yes, there are free versions, but although their uses are limited, they often suffice
Question 2: Can we integrate ChatGPT with visualization tools other than Tableau?
Answer: Yes, and this is done by following the same steps that we followed above
Question 3: Does ChatGPT give accurate answers?
Answer: Not only accurate answers, but very accurate in general, when the information is entered correctly
In the end, I hope that you have found valuable information in this article as a data analyst looking for permanent and continuous development in his work. A successful person, my friend, as you know, is the person who accomplishes his work accurately and as quickly as possible.
If you find the benefit, please share with friends and support us, and quickly join wonderful partners by following the blog. We are honored to have you with us.. Welcome.
Tableauو ChatGpt تصور البيانات باستخدام

مع تطور أدوات وبرامج تحليل البيانات أصبح بمقدور مستخدمي التصورات البيانية
Tableau على برنامج
توفير الوقت والجهد عن طريق الاستفادة من
Tableau و ChatGpt التكامل بين
وبالتالي أتمتة المعالجة بمرونة أكثر
كيف يتم ذلك؟ هذا ما سنوضحه في مقالنا اليوم، هيا لنبدأ
ChatGPT كما ذكرنا ستتم العملية بالاستعانة بتطبيق
ما هو مفهوم هذا التطبيق؟
لن ندخل في تفاصيل تقنية معقدة تشرح آلية عمل هذا التطبيق فليس هذا موضوعنا اليوم وربما نخصص له شرحاً تفصيلياً في القادم من الأيام وإنما ما يهمنا شرحه الآن هو ما يخدم الموضوع الذي نتحدث فيه
Tableau وهو التكامل مع وظائف
هو روبوت محادثة يعتمد على الذكاء الاصطناعي ChatGPT
ويمتاز بقدراته المذهلة في إجراء المحادثات والتفاعل مع الأسئلة والاستفسارات بطريقة لغوية طبيعة تشبه رد فعل الإنسان ويمكنك الاستعانة به في مجموعة متنوعة من الوظائف والاستفسارات بما فيها تصور البيانات التي هي محور موضوعنا لهذا اليوم
OpenAI API نحتاج في البداية إلى تثبيت
ChatGBT كخطوة أولى للشروع في استخدام
ثم مصادقة بيانات الدخول الخاصة بنا
JavaScript ويتم ذلك باستخدام
: وإدخال الكود التالي

وعند إتمام هذه العملية أصبح بمقدورنا
Tableau لإنشاء تصورات في ChatGpt استخدام
؟Tableau مع وظائف ChatGPT ما أهمية تكامل
باختصار تمكن الضرورة الأساسية لعملية الدمج هذه بأنها تتيح الإجابة على أصعب الأسئلة والاستفسارات بطريقة سهلة وبلغة طبيعية
من تصور هذه الإجابات Tableau ومن خلالها يمكننا
كما ويمكننا من خلال عملية الدمج هذه إنشاء لوحات معلومات تفاعلية تساعد المستخدمين في إيجاد الحلول على استفساراتهم في زمن مناسب وبالتالي قدرتهم على تحديد أنماط بياناتهم والقيم المتطرفة بسرعة عالية تجعل الوصول إلى قرارات سليمة أمراً أكثر سهولة
Tableau مع ChatGPT لنتعرف الآن على كيفية الدمج
يتم ذلك بتنفيذ المراحل التالية
بمصدر بياناتك Tableau المرحلة الأولى: ربط
ويتم ذلك بتحديد الزر “اتصال” في الزاوية اليسرى العلوية
Tableau من واجهة
ثم تحديد مصدر البيانات
TabPy المرحلة الثانية: تثبيت وتجهيز
Python هي حزمة TabPy
Tableau النصية في Python تتيح لنا استخدام تعليمات
أولاً أدخل الأمر التالي

TabPy وبعد الانتهاء من تثبيت
Tableau نتجه إلى تهيئته للعمل مع
TabPy ويتم ذلك بتشغيل
terminal بواسطة الأمر التالي في

ChatGPT API المرحلة الثالثة: تثبيت وتجهيز
REST هي واجهة ChatGPT واجهة برمجة تطبيقات
نقوم في هذه المرحلة بتثبيت وتجهيز واجهة
ChatGPT برمجة تطبيقات
ChatGPT ولنتمكن من إحداث التفاعل مع نمط
ChatGPT API نقوم بتثبيت
ويتم ذلك عن طريق إدخال الأمر التالي
Terminal window في

ثم بعد ذلك نقوم إعداد المصادقة
API ويتم ذلك بالحصول على مفتاح
OpenAI من خلال طلب اشتراك في
Python لتنتقل بعدها إلى إعداده في
:بواسطة تشغيل الأمر التالي
( بايثون )Tableau و ChatGPT إنشاء التكامل بين
بعد إنجاز المراحل السابقة بنجاح
Tableau مع ChatGPT يبقى أمامنا إنشاء تكامل
:ويتم ذلك باتباع الخطوات التالية
:الخطوة الأولى
ChatGPT API اختيار دالة بايثون التي تستدعي
هنا إعادة الاستجابة ChatGPT وظيفة
من الاستعلامات المدخلة إليها
وهذا ما يوضحه المثال التالي

TabPy الخطوة الثانية : استخدام
في تسجيل وظيفة بايثون
TabPy وهذا يعني تسجيل دالة بايثون مع
Tableau ليتم استعمالها في
Terminal window ويتم ذلك بتشغيل الأمر التالي في

TabPy وهنا سيتشكل ملف تكوين لـ
: افتحه وأضف الأسطر التالية
TabPy قم بحفظ الملف، ولبدء
عليك تشغيل الأمر التالي

Tableau الخطوة الثالثة: استخدم دالة بايثون في
Tableau جديد في workbook وللقيام بذلك نفتح
ونقوم بالإجراءات التالية
إلى لوحة التحكم “Text” نسحب الكائن *
“Edit text” انقر فوق النص واختر *
وفي صندوق الحوار اكتب الصيغة التالية

ثم انقر فوق “موافق” فيُغلَق صندوق تحرير النص *
إلى لوحة التحكم “Parameter” اسحب الكائن *
“Create Parameter” في صندوق حوار *
“all” واختر “String” اضبط نوع البيانات على
على القيم المتاحة واضبط القيمة الحالية
ثم انقر الأمر موافق “empty string” على
انقر بالزر الأيمن للماوس “Parameter” على الكائن *
“Show Parameter Control” واختر
Enter واضغط “Input Text” اكتب استعلاماً في *
في كائن “نص” ChatGPT سيعرض الرد من *
معاً Tableauو ChatGPT ثم يتم استدعاء
قد يبدو الدمج عملية متعبة في البداية ولكن تنفيذها بشكل متكرر ولو على نطاق ضيق سينمي عندك المهارات ويطور القدرات على معالجة البيانات بشكل مرن وسريع ويساعدك على استكشاف المشكلات ومعالجتها بفاعليها أكبر من ذي قبل
: إنشـــــــــــاء التصورات
:ChatGpt باستخدام
ChatGpt أول ما نحتاج إليه هو تزويد
بالبيانات المراد تصورها، وبعد تلقيه البيانات التي لقناه إياها عن طريق مجموعة أو عن طريق تمرير جدول سيقوم بإنشاء التصور وفق الطلبات الموكلة إليه
JavaScript شاهد في هذا الكود المدخل في
كيف نقوم بإنشاء تصور

OpenAI API في الكود السابق نستعين بوظائف
لتوليد مخطط شريطي للمبيعات حسب الموقع
ChatGpt نُدخِل هذا الطلب في
عبر المتغير الفوري، ولإنشاء التصور
client.completions.create نستخدم وظيفة
Tableau وفي النهاية يمكننا عرض التصور الناتج في
والذي كان قد خزن مسبقاً في متغير الرسالة
تغيير خصائص التصورات الناتجة
يمكننا تخصيص التصورات الناتجة وفق متطلباتنا من حيث تغيير نوع التصور وحجمه ونمط الألوان
إضافية parameters بـ ChatGpt ويتم ذلك عن طريق تزويد
JavaScript ويمكننا تنفيذ ذلك عن طريق استخدام الكود التالي في

مختلفة parameters وتذكر دائماً أن تجريب
يعتبر أداة قوية لتحصل على بيانات مرئية جذابة ومبتكرة
ما فعلناه في الكود السابق هو أننا قمنا بإنشاء مخطط خطي للأرباح بمقدار ربع سنة باستخدام اللون الأزرق
من خلال المتغير الفوري ChatGpt ثم أدخلنا طلبنا في
ثم حددنا نمط التصور المناسب فنتج لدينا مخطط خطي بلون أزرق وبحجم وفق الطلب
Tableau إظهار المرئيات في
وللتذكير.. كل ما سبق من مراحل وإجراءات
ChatGpt هي إنشاء تصور باستخدام
أول ما علينا فعله هو نسخ التصور الناتج من متغير الرسالة
ويتم ذلك بتنفيذ المراحل التالية Tableau ولصقه في
Tableau أنشئ ورقة عمل جديدة في *
“Marks” من جزء “Text” اختر *
الصق التصور المنسوخ من متغير الرسالة في مربع النص واضبط حجم مربع النص ليناسب التصور *
Tableau تهانينا .. لقد ظهر التصور أخيراً في *
وفي نهاية مالقتنا اليوم اسمحوا لي أن استبق الأمور وأجيب بكل سرور عن بعض الأسئلة التي على الأرجح قد تتبادر إلى أذهان بعض القراء
؟ChatGPT السؤال الأول: هل يوجد نسخ مجانية من
الجواب: نعم يوجد إصدارات مجانية ولكنها ورغم أن استخداماتها محدودة ولكنها غالباً ما تفي بالغرض
ChatGPT السؤال الثاني: هل نستطيع دمج
؟Tableau مع أدوات تصور أخرى غير
الجواب: نعم ويتم ذلك باتباع نفس الخطوات التي اتبعناها آنفاً
أجوبة دقيقة؟ ChatGPT السؤال الثالث: هل يعطي
الجواب: ليست أجوبة دقة فحسب، بل بمنتهى الدقة بشكل عام وذلك عند إدخال المعلومات بشكل صحيح
وفي النهاية آمل أن تكون قد وجدت في هذا المقال معلومات قيمة كمحلل بيانات يبحث عن التطور الدائم والمستمر في عمله فالشخص الناجح يا صديقي كما تعلم هو الشخص الذي ينجز عمله بدقة وبأسرع وقت ممكن
فإن وجدت الفائدة أرجو أن تقوم بالمشاركة بين الأصدقاء وتقديم الدعم لنا وسارع بالالتحاق بشركاء رائعين عن طريق متابعة المدونة فنحن نتشرف بوجودك معنا.. أهلاً بك
